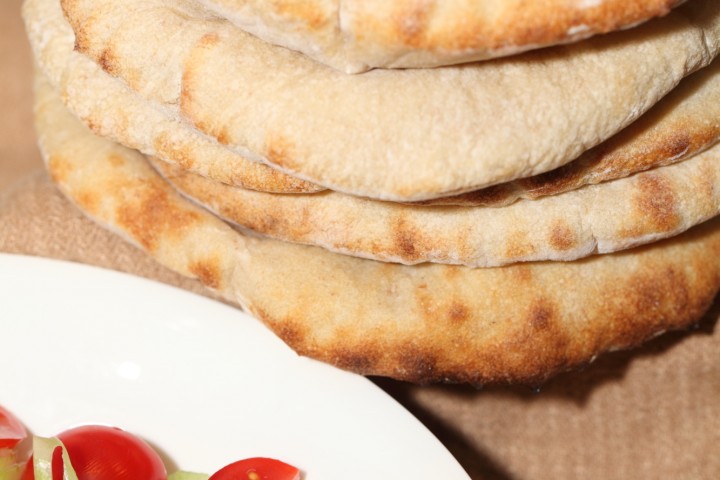
Pita bread is ancient, but still best when eaten fresh of course…
Klik hier voor de Nederlandse versie
Simplicity is key for this recipe. I think flatbreads, from all over the world, be it naan, chapati, lavash, pita, or tunnbröd from the Northern regions, are meant to be everyday, unsophisticated and natural. They are old fashion fast food and that is why making flatbreads should not be overly complicated or laborious.
With this recipe, because we are talking sourdough, you have to plan ahead a little bit. It takes longer for the dough to develop than if you were using a yeast based dough. Personally I find it works best to make the dough 24 hours in advance. For example, when you come home from work you make the dough that you are going to use the following day. Next day, you come home, preheat the oven, do some shaping and bake the pita bread, while preparing the things you want to eat with them.
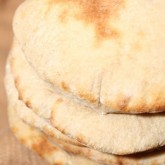
The best thing about this bread is the ‘puffing up’ part. I can never get enough of watching the bread inflate just a few minutes after trowing the dough in the oven. I still jump up and down with joy when that happens. And watching this, you can be sure you will have your bread pocket to fill after it comes out of the oven.
Lets get baking!

| Ingredients for the Pita | ||||
|---|---|---|---|---|
| 500 | g | wheat (bread / plain) flour | ||
| 280 | g | water | ||
| 9 | g | (sea) salt | ||
| 20 | g | sourdough culture (100% hydrated, equal parts flour and water: see our recipe here) |
||
| 15 | g | olive oil | ||
Making the Pita
Make the dough by kneading all the ingredients in a free standing mixer for 4-5 minutes (by hand 8 to 10 minutes). Place the dough in a greased bowl, cover with clingfilm and leave to rest for up to 24 hours at a cool room temperature (18 – 20°C / 64 – 68°F). Like I said in the introduction, 24 hours works perfect for me and my sourdough culture to get the right dough consistency and taste development. But every culture is different and can act different so you have to give it a few tries to find your own optimum.
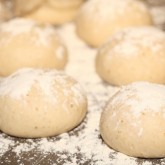
For the next step you divide the dough in 8 equal parts (slightly over 100 g each) and shape into balls. Cover and leave to relax for 10 minutes while you preheat your oven as hot as possible. Some ovens go to 250°C / 480°F, but if yours goes to 300°C / 570°F, that’s even better. Make sure the stone or rack you are going to use is also in the oven while you preheat, because you want your bread baked directly on a hot surface. I preheat our household oven to 300°C / 570°F conventional setting and just before I put the first pita in the oven I switch to the convection setting (which only goes to 250°C / 480°F). It is a sort of trick to get the best from both settings, first get the oven as hot as possible and after that the hot air helps with the puffing up part.
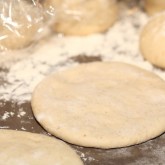
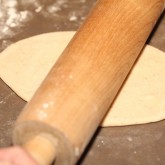
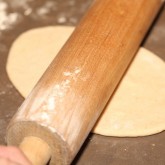
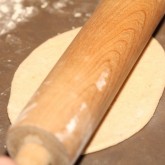
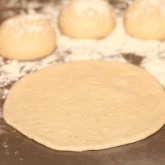
Now take a ball of dough and gently shape it by hand to a disc shape (see first picture in the gallery above). Take a disc and, with a rolling pin, roll out the disc to a circle of around two to three millimeters thickness. I love to practice my skills to get the perfect circle, but you can also make oval shapes. The bread will be equally delicious. You can also do this second shaping part by hand, but I have found that the puffing up bit works best when I try and roll out the dough evenly. Always roll from the middle to the edges and turn the dough a few times, so it will be rolled out evenly and round.

This pita is filled with spicy shoarma chicken and a garlic yoghurt dressing, but it is also classically good with falafel for instance
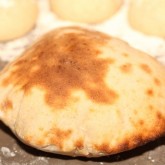
Now ‘throw’ a rolled out disc on the hot rack or stone. Be swift so your oven does not drop in temperature too much. You can bake several at once of course, but it is best to do a trial version of one pita first and see how that comes out. Now watch how it puffs up (the fun part!) and take it out after 3 to 4 minutes. Repeat the process with the other dough balls.
You can keep the baked pitas warm between two tea towels (they will stay warm for quite a while this way). I think they are best eaten fresh and warm but you can freeze leftover pitas (no longer than a few weeks). Thaw them and give them a minute in your toaster. Still delicious!
Also check out our other favorite flatbread recipes like Indian Naan or Nordic soft Polar Bread.
If you want to make a quick yeast version of this recipe use 290 grams of water and 7 grams of instant yeast for the dough. Leave to proof for 1 hour, divide and make balls and leave to relax for 10 minutes. You can follow the recipe from there.





L. says
I would like to thank you for this recipe. It has been my favourite for many years now.
I pray life gives you generously.
LC
Weekend Bakers says
Thank you so very much for your kinds words.
Maureen says
Do u have recipe for sour dough starter?
Weekend Bakers says
You can find the sourdough starter in easy steps instruction page here:
www.weekendbakery.com/posts…asy-steps/
Nynke van der Ven says
Can you make these with Rye flour too? perhaps by adding more starter?
Nynke vdV
bea says
I had a 50/50 success rate with mine: 4 puffed up beautifully and 4 didn’t (i ended up burning them waiting for them to puff). All of them were rolled equally thin. Any ideas what can cause a lack of puff?
Weekend Bakers says
Hello Bea,
We are not sure, maybe the temperature of the oven was lower with them?
Dan Fleet says
Worked brilliantly, but just did my own thing loosely based on the recipe.
Weekend Bakers says
Thanks for the feedback. As long as you are happy with the result!
RJP says
I literally spent more than six months experimenting to get good sourdough pita-bread. I never got a dough that created a pocket or was strong enough to hold its shape between counter and oven. This recipe worked perfectly on the first try!!! Whoever created this recipe, my family thanks you immensely for it!
Weekend Bakers says
Thank you so much for the feedback RJP! Very happy it worked out so well.
Assi says
Hi,
Can I use discard here, or should the starter be active?
Weekend Bakers says
Hello Assi,
We use active starter for this recipe.
Hope it will be excellent!
James Powell says
Hi There
I followed this recipe but at the end of it all they didn’t puff up. I could cut into them but the were crispier and less puffy than I would have hoped.
Any tips?
Weekend Bakers says
Hello James,
What oven setting and temp did you use and did you also make the same amount of pita’s as we do (8).
When rolling do not press too hard on the dough and take too long to shape them. You can also try and use your hands for (part of) the shaping.
Do not roll out too thin, so stick to around 3 mm thickness if possible.
James says
Hi – thanks for answering!
I used the highest temperature (250 ish – difficult to give an exact temperature actually) and it is a fan oven (falcon).
We did make 8 but i guess it could have been the length of time we took to roll them out, How hard they were rolled, how much flour on the surface getting added, etc.
What is the general rule of thumb here?
Weekend Bakers says
Hello James,
We use almost no flour, maybe a bit on the rolling pin. The rolling should be well under a minute, more a question of say 20 to 30 seconds. So do not fumble to much with the dough, do not press too hard, make sure to quickly open and close the oven door to keep the heat in, look at the thickness (because they should not be ‘crispy’ which sounds like too thin).
Just give it another go and enjoy!
James says
Thanks. And I will.
Tony Jones Again says
PS We used our little electric pizza oven, so 300C+ was easy.
Pittas split easily.
Weekend Bakers says
Also good to know, this type of oven can be used with good result!
Tony Jones says
Thank you for saving me!
I was about to make sourdough bread, mixed everything, and as I put the flour back I said “Do you know – the plain and bread flours are in the same packaging – I should mark them up clearer to stop me using the wrong one!”
TOO LATE!
I’d already used plain flour!
Not wanting to waste 500g of flour, my cleverwife said Pitta!
I found your recipe, and your calculator allowed me to add the right amount of flour to the mix.
Next day we had superb bacon & egg pittas! Delighted family!
Thanks very much – I’m going to start looking at your 4-day San Fran loaf now!
Weekend Bakers says
You did well Tony! Glad we could play a part in this success, as did your wife of course!
Greetings from sunny Holland
Jackie says
I tried this recipe for the first time. I’ve been making sour dough boules from a starter for about 3-4 years. The first ones I rolled out too thin and they bubbled but didn’t completely separate. Then I started rolling them to about 7″ across and that’s when they completely puffed up! They look like pita but since I forgot to add the salt and the oil they don’t taste exactly right but still good. They are a bit tough though and more crispy than soft. Should I try putting a pan of water in my oven? What will make them softer?
Weekend Bakers says
Hello Jackie,
We think it would be a good idea to add the salt and oil and give it another try!
You should also put the baked pitas between two towels directly after baking and our last tip would be to maybe shorten the baking time a bit.
Enjoy your pita baking!
Bob says
We just enjoyed these for dinner tonight, but even though they made excellent bread, our results weren’t very pita-like. Our pita got quite sour after a 24h ~73F ferment (a sour I would have enjoyed in some of our mild SD boules), and the texture was too chewy (but good!) and pebble-y on the surface like a sourdough bread. Cooked on cast-iron skillet inside ~475F oven. Puffed nicely. I suspect 1) we over-fermented, and 2) over kneaded (used bread flour). Hope this helps someone. Thanks for the excellent baking website.
Weekend Bakers says
Hello Bob,
Thank you for the feedback. We understand what you explain and at the same time this is a complex thing because every sourdough culture has its own ‘temperament’. It could be your result will be better with shorter fermentation and the use of your starter at higher hydration (lowering the acidity).
Enjoy your baking, cooking and sharing!
Marieke & Ed
WKB
Laura Etheridge says
Thanks so much for this recipe. I’ve been baking sourdough for quite a while with great success but I hadn’t try my hand at making pita breads. It’s sooo easy, and fun to watch them while they rise in the oven. I wish I could post a photo. Next on my list is your Naan and the Sesame Semolina Loaf 😉
Weekend Bakers says
Hello Laura,
Thank you, that is wonderful! You can, if you like share your pictures (and accompanying comments) on our ‘yourloaves’ page:
www.weekendbakery.com/send-…your-loaf/
Always happy to see the results!
Enjoy the other bakes too and let us know how they go,
Ed & Marieke
WKB
LiLian Randell says
Hi –
Another great recipe, thank you. I cooked a couple in the oven which I already had on so I just increased the temperature and threw them onto a preheated cast iron skillet with a blast of steam. They were very tasty and the base was slightly crispy (I’d rolled them out more thinly than in your photos), which I liked even though that isn’t traditional in pita.
As an experiment I kept some dough balls in the freezer. A few days later I let them come to room temperature and after a few hours they came ‘alive’ again. I rolled them out & then cooked them over the hob in a hot griddle. They still puffed up but I think the oven version was better.
Weekend Bakers says
Thank you so much Lilian, great to read about your experience and experiments with the dough and method. We are sure, next to us, many other home bakers will find this very helpful too. We almost never freeze dough of any kind, as we find the quality is always less, so most of our bread and pastry goes in the freezer after baking. With pitas, we bake them in our small pizza oven (Roccbox) and then put some in the freezer and a minute in the toaster and they are excellent.
Enjoy your baking!
Marieke & Ed
LiLian says
Hi Marieke & Ed –
I’ve continued making these with great success, and as you said, it’s better to cook them and reheat instead of saving the frozen dough. I discovered that my oven has a fancy programme with fan setting plus bottom heat plus steam (don’t hate me!) which is perfect for these.
I just wanted to let you know how flexible this recipe is. Last week after 23 hours I put the dough into the fridge because I didn’t have time to cook them at the time I’d originally planned to. After another 24 hours I let the dough come back to room temperature, shaped, & carried on as usual. They still came out perfectly.
Thanks again!
Weekend Bakers says
Hi again Lilian,
Thanks for sharing your experience with the recipe, that sounds excellent.
Indeed a fancy setting 🙂 Just enjoy the result it gives!
Happy baking these crazy times and enjoy the pita’s.
Chanan says
Hey there.
I bake sourdough bread in a professional bakery. I want to try my hand at Pitas. Do you think it’ll work with a spelt/ whole wheat flour combo? Also not a convection oven, so will I have an issue with it puffing up?
TIA.
Weekend Bakers says
Hello Chanan,
Only one way to find out we always say. Just do a test run, that is the best route to take. We would suggest to always change just one thing in a recipe. Maybe if possible first try one with wheat flour then make a version with a combo if wheat and spelt. Using spelt / whole wheat is more challenging, possibly even more with your oven setting possibilities. The heat you can generate in your oven is key to create steam. Heat it up as high as possible and preheat very well before the pita goes in.
Hope you will be able to get good pitas, but we think with your background, you will be able to get it right very soon.
Pedro Vinícius says
Hey! I want to try this recipe, but I have a doubt related to the sourdough. When you say “Sourdough culture (100%)”, do you mean 100% hydrated?
Weekend Bakers says
Hello Pedro,
Yes that is right, 100% hydrated.
Happy sourdough baking!
JulieE says
How much rise should I expect from the bulk ferment? Double in volume?
Weekend Bakers says
Hello JulieE,
Yes that would be perfect, but even if it is less, you can still go ahead and use the dough, it is less important with flatbread than ‘normal loaves’. We always look at the activity of the dough and less the volume.
Hope it will be great!
Tari says
Hi, thank you for the recipe.
This recipe is a keeper. I made many times with little alteration; increase the amount of starter and ferment for 12 hrs, mix with whole-wheat flour instead of just bread flour. When I am in hurry I use fresh baker’s yeast.
Perfect for broodje shoarma.
Weekend Bakers says
Thank you so much Tari, for sharing your experience with the recipe and the suggestions.
More recently we have been using plant based ‘shoarma’ combined for example with a delicious stew of onions, peppers and tomatoes and some fresh cucumber and coriander / cilantro with a dash of homemade chili / garlic sauce and it was just perfect.
Geniet van het bakken, de beste ‘hobby’ in roerige tijden vinden wij!
Groetjes,
Marieke & Ed
Weekend Bakers
Uri says
Hello! I live in a fairly warm apartment and I’m worried that 24 hours will be excessive. Can you provide some guidelines about how I might incorporate fridge proofing in making these pitas, as I normally would when baking sourdough bread?
Weekend Bakers says
Hello Uri,
You have several options. The first thing we would advice is to put the dough in the fridge, get it out 2 to 3 hours before use and keep an eye on it to see how it acts. Another suggestion would be to make the dough, let it ‘kick start’ for an hour at room temp, then place it in the fridge till you want to use it. It maybe takes a few tries to get it spot on, but you are the best judge of how quickly your dough develops under your conditions.
Using the dough slightly under-proofed is no problem for this bake and always better than over-proofed of course.
Hope it will be great!
Vesna says
Hi, I also have a warm house, around 25-26c, and I wonder how do I recognize that the dough is ready? Thx 🙂
Weekend Bakers says
Hello Vesna,
Like we said to Uri, It maybe takes a few tries to get it spot on, but you are the best judge of how quickly your dough develops under your conditions. We estimate that yours will be ready to use in about 10 to 12 hours. The test you normally do with a loaf or buns ready for the oven, does not really apply here. Look at the dough and judge if if it has developed and grown and still has a nice elasticity to shape into balls, it does not have to be ‘double in size’, it is more important it is not over-proofed.
Just give it a try!