

Looking back, we could have used some of these tips ourselves, when we started our baking adventures!
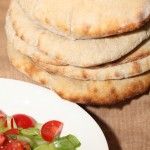
After we started baking artisan breads we discovered some bread baking fundamentals that could be helpful to other baking enthusiasts.
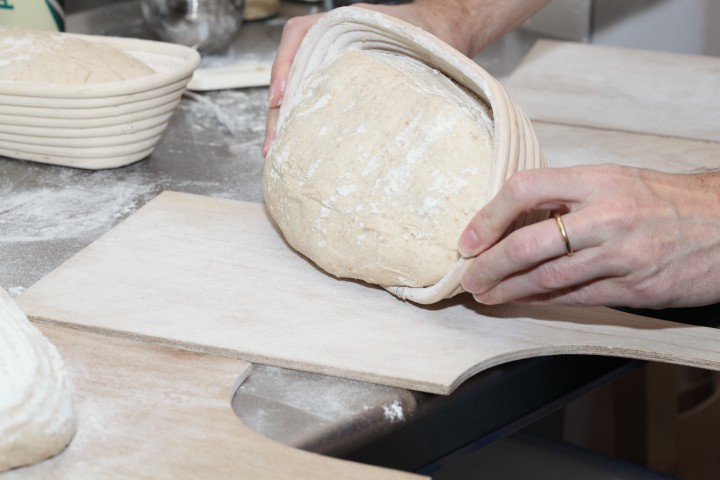
Useful bread baking tips: Dough

- For large irregular holes, use wet dough (65-67% water to flour) and do not fumble too much with your dough
- The longer you knead the dough, the finer the bread crumb becomes, so don’t over knead, let time and techniques like autolyse and stretching and folding help in developing the dough
- Use a preferment or sourdough starter if you want bread with maximum taste. For instance use 20% poolish with your regular white loaf or rolls for a more interesting, deeper bread taste.
- When scoring the dough, hold the lame/scoring knife at an angle of about 30 degrees to get that nice ear /curl in your crust. We use a scoring tool that we developed ourselves and is used by bakers worldwide, with perfect grip and high quality blade. If you want to take a look you can find it here.
- Try reducing the salt content in your bread by a gram or so at the time and see how you like it. Good salt balance benefits the bread and your health. We find that a lot of bread recipes can do with a little less salt.
- Use a kind of pizza stone in your oven to bake your bread and make sure you preheat your oven very thoroughly.
- Do not trust the thermostat of your oven at face value. Check your true temperature using an oven test thermometer
- Take one recipe you like and practice, adjust and fine tune it until it is completely to your liking and you can (almost) dream it. We found this way you learn much more than by constantly skipping from one recipe to the next (also see our tips about consistency in baking).


Stacy Thomas says
Indeed, your oven, especially after years of use, can end up not giving you the correct temperature. You don’t want to cook something when you don’t know the temperature you are cooking it at. If you do, you will end up over or under cooking it, and in both instances, the bread is ruined.
Rasmus says
In short, the main factors in a fluffy bread with big holes are:
– The right flour and balance between water and flour – depends greatly on flour quality.
– The right kneading – enough to make the gluten into an elastic structure with long threads, but not too much as it will break the structure.
– The right handling of the wet dough – avoiding collapsing the gluten structure.
– The right baking – 25-30 minutes at 225-250 degrees on a baking stone.
You can read a detailed description on the page below. I also have including videos to help you see the kneading.
www.rkursem.com/food/…ffy-bread/
Weekend Bakers says
Hi Rasmus, nice write up on your website. We will give your ciabatta style bread a try very soon!
Petra Robinson says
I am so greatful for all your tips in regards of baking the best bread.
I am just eating one which I done with your Stretch and folding Method and it is so light and airy.
Anna says
When I put my dough on top of a shelve, where it is 22 degrees Celsius, the dough gets a little bit of a crusty, hard surface. I placed a towel on top of my banneton. What am I doing wrong? This way it is not possible to determine if the dough is ready to go into the oven.
Thanks!
Anna
Weekend Bakers says
Hello Anna,
Although you covered your bread it was still drying out. The best way to avoid that is to use clingfilm (huishoudfolie) that you first give a liberal dusting with flour so it will not stick to the dough. Then, make sure the bread is completely covered with the floured clingfilm while proofing. This is our favorite method that we use all the time.
Happy Baking!
Marieke
john lapensee says
how do you determine % 65-67% water to flour?/ I’m using “the Italian bake , by carol fields Ciabatta. Lsst loaf had very good crust, but very small holes and not enough texture. Used KA flour and measured everything by weight.
Thanks, I’m a very new guy and having lots of fun with this.
Weekend Bakers says
Hello John,
Just add up the weight of all the flour in the recipe, add up the weight of all the liquid and divide the liquid by the amount of flour. Example: 500 g flour, 350 water (350 : 500 = 0.70 x 100 = 70% hydration).
Other example: If you have 500 g flour and want to aim for 62% hydration you need (500 : 100 x 62 =) 310 water.
Hope this helps and keep up the fun baking!
Ed & Marieke
Bill in UK says
I find that with a wet dough; mine are usually around 65 to 75%, I can get a great bread for sandwiches (light crumb with lots of little holes, easy to spread butter on) if I knead it for 10 minutes after autolysis using Bertinet’s method and a great bread for dunking in soup (big holes) with the stretch and fold method you guys use so I vary it according to the effect I want.
By the way: have you tried this 95% ciabatta: www.thefreshloaf.com/node/…atta-bread . It really works once you have got the hang of throwing the gloop around! My current variation is to add 100gm of sourdough starter and use 5 0r 10% rye or spelt for a light but more rustic ciabatta.
Weekend Bakers says
Hi Bill,
Thanks for sharing! So funny you mention the 95% ciabatta dough because we are busy with a new posting for a recipe where we use almost this exact same dough to make focaccia (and a funny type of dough it is, we made nice pics of the impressive window panes you can make with it) : our ‘ciabatta focaccia’ we call it . It works great.
Your addition of rye or spelt for the ciabatta sounds delicious.
Thanks again and happy baking!
nils masters says
cheers guys, helpful as ever 😀
nils masters says
hey, when you say dont knead the bread too much what do you mean, its just bertinet says work the dough till shiny and stops sticking to the work surface, is this too much? thanks
Weekend Bakers says
The techniques used by Mr. Bertinet are different from the ones we use. You have to find out which technique of making dough works best for you and which type of dough and bread you prefer to work with and to eat in the end.
So I think it is best to give it all a try. Of course it is correct what Bertinet describes in his book, working the dough this way you can get a perfect result. The techniques we use allow for the dough to develop by resting it a lot and not ‘fumbling about’ with it too much. So there is relatively little kneading time and the dough develops through techniques like autolysing and stretching and folding the dough. We prefer the structure and crumb you get using these methods.
There are also things like carotenoids in (good quality) flour that give your bread a nice taste. By kneading too much these carotenoids will oxidize and you will lose taste and that is always a shame.
Check out our baking glossary for things like autolysing www.weekendbakery.com/bread…-glossary/
And for the stretching and folding see our short clip: www.weekendbakery.com/posts…ld-method/
Happy baking!