
It’s all about the layers…
Klik hier voor Nederlandse versie
With this recipe we want to give you the exact directions on how we go about making classic French croissants. The recipe is an adaptation from the recipe for Classic Croissants by Jeffrey Hamelman. We started out largely following the instructions for his recipe, changed everything to our beloved metric system and found out some worthwhile croissant knowledge of our own along the way. Hopefully enough to justify sharing it all with you and inspiring you to give croissant baking a shot yourself.
Before you start we can recommend watching our croissant making video to get a general feel for the recipe. You can also check out our croissant making log where we keep track of our own croissant baking adventures. For answers to your croissant questions you can check out the Frequently Asked Croissant Questions section.
This recipe will yield about 15 good croissants plus some leftover bits which you can use to make a few, slightly odd shaped ones, or other inventive croissant-like creations.
If at first you don’t succeed, maybe you can take comfort from the fact that our first efforts were not very ‘croissant worthy’. But as you can see we persevered and got better…But we have to admit it is and always will be a tricky process. You have to work precise and be focused to get good results. So away with screaming children, hyperactive animals and all other things distracting! Put on some appropriate croissant making music and lets get to it…
Please read the following tips;
According to Raymond Calvel croissants laminated with margarine are formed into the crescent shape, while croissants laminated with butter are left in the straight form. We say, use whichever shape you like best, but do use butter!
The croissant recipe

Ingredients for the croissant dough
500 g French Type 55 flour or unbleached all-purpose flour / plain flour (extra for dusting)
140 g water
140 g whole milk (you can take it straight from the fridge)
55 g sugar
40 g soft unsalted butter
11 g instant yeast
12 g salt
Other ingredients
makes 15
280 g cold unsalted butter for laminating
1 egg + 1 tsp water for the egg wash
Day 1
Making the croissant dough
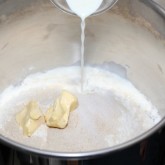
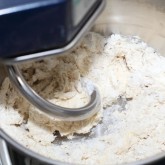
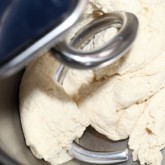
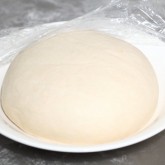
We usually do this part in the evening. Combine the dough ingredients and knead for 3 minutes, at low to medium speed, until the dough comes together and you’ve reached the stage of low to moderate gluten development. You do not want too much gluten development because you will struggle with the dough fighting back during laminating. Shape the dough like a disc, not a ball, before you refrigerate it, so it will be easier to roll it into a square shape the following day. Place the disc on a plate, cover with clingfilm and leave in the fridge overnight.

Day 2
Laminating the dough
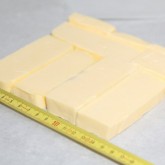
Cut the cold butter (directly from the fridge) lengthwise into 1,25 cm thick slabs. Arrange the pieces of butter on waxed paper to form a square of about 15 cm x 15 cm. Cover the butter with another layer of waxed paper and with a rolling pin pound butter until it’s about 19 cm x 19 cm. Trim / straighten the edges of the butter and put the trimmings on top of the square. Now pound lightly until you have a final square of 17 cm x 17 cm. Wrap in paper and refrigerate the butter slab until needed.
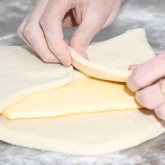
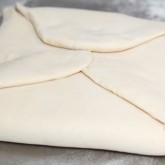
Take the dough out of the fridge. With a rolling pin roll out the dough disc into a 26 cm x 26 cm square. Try to get the square as perfect as possible and with an even thickness. Get the slab of butter from the fridge. Place the dough square so one of the sides of the square is facing you and place the butter slab on it with a 45 degree angle to the dough so a point of the butter square is facing you. Fold a flap of dough over the butter, so the point of the dough reaches the center of the butter. Do the same with the three other flaps. The edges of the dough flaps should slightly overlap to fully enclose the butter. With the palm of your hand lightly press the edges to seal the seams.

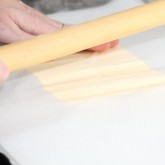
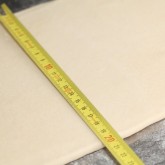
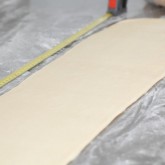
Now the dough with the sealed in butter needs to be rolled out. With a lightly floured rolling pin start rolling out, on a lightly flour dusted surface, the dough to a rectangle of 20 x 60 cm. Start rolling from the center of the dough towards the edges, and not from one side of the dough all the way to the other side. This technique helps you to keep the dough at an even thickness. You can also rotate your dough 180 degrees to keep it more even, because you tend to use more pressure when rolling away from you than towards yourself. You can use these techniques during all the rolling steps of this recipe. Aim at lengthening the dough instead of making it wider and try to keep all edges as straight as possible.
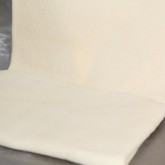
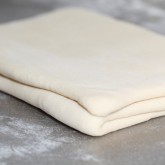
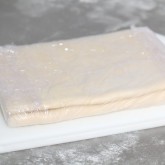
Fold the dough letter style, cover with clingfilm and refrigerate for 30 minutes (fold one third of the dough on top of itself and then fold the other side over it). Repeat the rolling and folding two more times (ending up with 27 layers of butter in total), each time rolling until the dough is about 20 cm x 60 cm. After each fold you should turn the dough 90 degrees before rolling again. The open ‘end’ of the dough should be towards you every time when rolling out the dough (you can see this in our croissant making video at around 3:40 minutes). After the second turn, again give it a 30 minute rest in the fridge. After the third turn you leave the dough in the fridge overnight until day 3, the actual croissant making day!
- Roll out to 20 cm x 60 cm
- Fold
- Refrigerate 30 minutes
- Rotate 90 degrees
- Roll out to 20 cm x 60 cm
- Fold
- Refrigerate 30 minutes
- Rotate 90 degrees
- Roll out to 20 cm x 60 cm
- Fold
- Refrigerate until day 3
- Rotate 90 degrees
- Roll out to 20 cm x 110 cm
Also see complete time table at bottom of page

Day 3
Dividing the dough
Take the dough from the fridge. Lightly flour your work surface. Now very gently roll the dough into a long and narrow strip of 20 cm x 110 cm. If the dough starts to resist too much or shrink back during this process you can fold it in thirds and give it a rest in the fridge for 10 to 20 minutes before continuing. Do not fight the dough, when the dough refuses to get any longer, rest it in the fridge! It is such a shame to ruin two days of work.
When your dough has reached its intended shape, carefully lift it a few centimeters to allow it to naturally shrink back from both sides. This way it will not shrink when you cut it. Your strip of dough should be long enough to allow you to trim the ends to make them straight and still be left with a length of about 100 cm.
Shaping the croissants
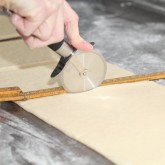
For the next stage you will need a tape measure and a pizza wheel. Lay a tape measure along the top of the dough. With the wheel you mark the top of the dough at 12,5 cm intervals along the length (7 marks total). Now lay the tape measure along the bottom of the dough and make a mark at 6,25 cm. Then continue to make marks at 12,5 cm intervals from this point (8 marks total). So the bottom and the top marks do not align with each other and form the basis for your triangles.
Now make diagonal cuts starting from the top corner cutting down to the first bottom mark. Make diagonal cuts along the entire length of the dough. Then change the angle and make cuts from the other top corner to the bottom mark to create triangles. Again repeat this along the length of the dough. This way you will end up with 15 triangles and a few end pieces of dough.

Using your pizza wheel, make 1.5 cm long notches in the center of the short side of each dough triangle.
Now very gently elongate each triangle to about 25 cm. This is often done by hand, but we have found that elongating with a rolling pin, very carefully, almost without putting pressure on the dough triangle, works better for us. You can try both methods and see what you think gives the best result.
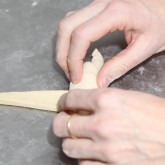
After you cut a notch in the middle of the short end of the triangle, try and roll the two wings by moving your hands outwards from the center, creating the desired shape with a thinner, longer point. Also try and roll the dough very tightly at the beginning and put enough pressure on the dough to make the layers stick together (but not so much as to damage the layers of course).

Proofing and baking
Arrange the shaped croissants on baking sheets, making sure to keep enough space between them so they will not touch when proofing and baking. Combine the egg with a teaspoon of water and whisk until smooth. Give the croissants their first thin coating of egg wash. You do not need to cover the croissants with anything, the egg wash will prevent the dough from drying out.
Proof the croissants draft-free at an ideal temperature of 24ºC to 26.5ºC / 76ºF to 79ºF (above that temperature there is a big chance butter will leak out!). We use our small Rofco B20 stone oven as a croissant proofing cabinet by preheating it for a minute to 25ºC / 77ºF. It retains this temperature for a long time because of the oven stones and isolation. The proofing should take about 2 hours. You should be able to tell if they are ready by carefully shaking the baking sheet and see if the croissants slightly wiggle. You should also be able to see the layers of dough when looking at your croissants from the side.
Preheat the oven at 200ºC / 390ºF convection or 220ºC / 430ºF conventional oven.

Right before baking, give the croissants their second thin coat of egg wash. We bake the croissants in our big convection oven for 6 minutes at 195ºC / 385ºF, then lowering the temperature to 165ºC / 330ºF, and bake them for another 9 minutes. Hamelman suggest baking the croissants for 18 to 20 minutes at 200ºC / 390ºF , turning your oven down a notch if you think the browning goes too quickly. But you really have to learn from experience and by baking several batches what the ideal time and temperature is for your own oven. Take out of the oven, leave for a few minutes on the baking sheet, then transfer to a cooling rack.
Latest way of baking; We heat up our double fan big convection oven at 200ºC, when heated up put the croissants in the oven and directly lower it to 175ºC. We bake them for 10 minutes at 175ºC, they will have a nice brown color by now, then lower the temperature to 150ºC, and bake them for another 6 minutes.
Best eaten while warm and fresh of course. Croissant we don’t eat or share within a day we freeze. We put them in the preheated oven (180ºC / 355ºF) for 8 minutes straight from the freezer. Nothing wrong with that, croissants eaten nice and warm, almost as good as the fresh ones…almost!
Croissant Time Table
Times are an indication and also depend on your experience with the recipe
Try to work swift but precise and take extra fridge time if needed!
Day 1 – Make initial dough
- 21.00 h – Knead for 3 minutes and store in fridge for 12 hours
Day 2 – Laminate the dough
- 09.00 h – Make butter slab and refrigerate till needed
- 09.05 h – Roll dough disc into square
- 09.10 h – Seal butter in dough
- 09.15 h – Roll out to 20 cm x 60 cm and fold
- Refrigerate 30 minutes
- 09.50 h – Rotate 90 degrees
- Roll out to 20 cm x 60 cm and fold
- Refrigerate 30 minutes
- 10.25 h – Rotate 90 degrees
- Roll out to 20 cm x 60 cm and fold
- 11.00 h – Refrigerate until day 3
Day 3 – Dividing, Shaping, proofing and baking
- 09.00 h – Roll out to 20 cm x 110 cm – part 1
- 09.05 h – Often needed! Take 20 min. fridge time if length not in one go
- 09.25 h – Roll out to 20 cm x 110 cm – part 2
- 09.30 h – Divide and shape the croissants
- 09.40 h – First coat of egg wash
- 09.45 h – Proof to perfection (indication 2 hours)
- 11.45 h – Second coat of egg wash
- 11.50 h – Bake for 15-18 minutes
- 12.10 h – Ready!








Elizabeth says
Thank you, thank you, thank you!
Finally, instructions and pictures that make sense, and deliver wonderful results. I made croissants over the weekend that looked (almost?) as good your pictures.
I am a culinary student and right now my class is artisan bread. My instructor (I use the term loosely) insists that we make croissants in one day. We were taught to smear the soft butter over the dough and told that if we worked fast enough, we could do all our folds before needing to chill the dough. I have never been successful following his instructions. (He never demonstrated the technique, just told us to do it that way.)
Our baking final is coming up, and I will use your formula and instructions. I will be practicing all week to see if I can make them in one day. Any tips for me?
Elizabeth
Weekend Bakers says
Hi Elizabeth,
Mmmm soft butter you say. We cannot say we ever tried this technique but it is a bit curious you did not get a demonstration!
We must confess, we have never made our own recipe in one day. Two days yes, making the initial dough on day one and the next stages in one day, the next day. Of course it is possible to do it all in one day. Depending on how much time you have, you can let the initial dough rest for 30 minutes to one hour outside the fridge, then the same period inside the fridge so you can start the laminating with dough and butter that is cold enough to work with. Do your laminating like described and after the third turn again maybe a combination of some time at room temp and some time in the fridge before dividing and shaping. It also depends on the temperature of the room you are working in and at what temperature you will be able to proof the croissants.
Write out a schedule, based on how many hours you have, see how much time you have for each step and see where you can afford more or less time.
Best of luck with it and let us know how it worked out!
Marieke & Ed
Karuna says
I like it
Austin Dayacap says
/crying hysterically/
“Choose a cold day with a room temperature below 20 ºC / 68 ºF .”
A normal day in my country is 85F with around 73F room temperature… I guess I have to move my working table to my grandma’s air conditioned room. :))
Weekend Bakers says
Hi Austin,
That actually sounds like a plan 😉
But if that is too much trouble, you should use the fridge as often as needed. You can even put your tools and flour in the fridge so they will give you at least a cool start. A worktop made of cooler material like marble is also helpful.
As you might have read in other comments, some people try to bake them in the tropics, so with 73F and some fridge aid, you should be able to make it work, just give it a few tries to get a good feel for the recipe and build up some speed.
Good luck with it!
Tay Sultan says
Hi,
I have two questions : what to do when some holes appear in the dough and butter is coming out during the folding , how can I fix it ?
Second question : should the milk be cold or it should be warm ? what is the best degree for the milk and water, ? thanks.
Weekend Bakers says
Hi Tay,
We are sorry, fixing holes in this dough is not really going to give you good results, if there are one or two then you can patch them up as good as possible, but if there are multiple it will probably not be a success. So be careful and avoid holes.
And as it says in the ingredients list, you can use the milk straight from the fridge, so cold, which means in most cases it will be around 5 to 10 degrees Celsius.
Good luck with it.
Vanessa says
Hi guys
Great recipe! I’m just trying it now but read the recipe and now I’m wondering whether I could skip the extra day (ie laminating and baking the croissants on the same day).
I need them for afternoon tea tomorrow and just made the dough tonight…
Thanks!
Weekend Bakers says
Hi Vanessa,
Yes that is possible, the reason for the extra day is the timing, being able to make the croissants the morning of day three.
Just give it an extra fridge period (40 minutes) after the laminating and then continue.
Andre Beluchi says
Oh wow, so there is a recipe in how to make french croissant. I remember seeing this type of bread at a store where my my usually shops for buns. The smell of this type of bread sure is amazing as well as the taste.
Weekend Bakers says
One of the perks of making your own – the wonderful smell of the dough and baking. If you like baking and have some experience it is really worth giving it a try!
Andrea says
Hi there
Quick question. Can I freeze the croissants once shaped before I prove them so that I can bake them at a later date or do I need to shape and prove before freezing? Hope this makes sense.
Thank you
Weekend Bakers says
You can do both, you just need to make sure they are always perfectly proofed when you take them to the oven!
Morris Baker says
The process of croissants is so amazing and i do recommend the procedure!
Weekend Bakers says
Thank you Mr. Morris Baker!
Andrea says
Hi there
Am making this recipe this weekend, but I have a couple of questions:-
How do I know when my dough is at the right consistency, what does low to moderate gluten development mean?
Am using fresh yeast, will all the stages take longer, i.e. proofing?
Thanks in advance
Andrea
Weekend Bakers says
Hi Andrea,
If you do not have the experience yet to know what dough of moderate gluten development looks like, you can begin by just sticking to the 3 minutes kneading from the recipe. It is definitely before the window pane stage, if you are familiar with that. Using the right amount of fresh yeast (times 3 the amount based on instant yeast) it should take about the same time.
Tay Sultan says
I want to say that your recipe is the BEST EVER , thank you for sharing and many thanks for the instructions , you make it so easy to make.I have made your croissants three times now , the result is perfect. I am sure that this is the recipe and the way to make my croissants that I will always use.Many thanks to you again.
Weekend Bakers says
Thank you Tay,
And if you want to have some more fun with the laminated dough you can also try this recipe which we love: www.weekendbakery.com/posts…x-raisins/
Tay Sultan says
Hi, would you please can you explain what do you mean by ” The open ‘end’ of the dough should be towards you every time when rolling out the dough.” ,I could’nt figure out which side is the open side or the open end? thank you.
Marita O says
If I am not mistaken they are referring to the “open end” as the thinner end with the folds and not the folded over flap. So you want to continue to roll it out with the shorter end towards yourself.
Weekend Bakers says
Hi Tay, if you look at our video at around 3.40 minutes you can also see what we mean:
www.weekendbakery.com/posts…roissants/
Tim says
Amazing recipe. Turned out perfectly. Thank you!
Weekend Bakers says
Thanks for trying and liking it Tim!
Tay Sultan says
Many thanks to you for answering my questions.I have tried your recipe for the first , and the croissants came out much better than any other recipes I used before to make croissant..still I noticed that the proofing was not as large as it should be ? ! no doubt I will try again , but I need to know why the croissants are not covered during the proofing ,besides,can I use the egg wash only one time just before baking ,or the final result would be different ? Thank you.
Weekend Bakers says
Hi Tay,
The croissants are indeed not covered but get two coats of egg wash, this also protects them, so it is not necessary to cover them. If it is necessary for other reasons to cover them you can of course do so, always make sure they are also in a draft free spot (you can also use a cold oven for this). You can also use the egg wash only once, but of course this will have some impact on the result as the layer will be thinner, but it will not be any problem.
Marita O says
Hello!
Well I must say that this is probably one of the best written out recipes I have seen!
I am a self taught in the kitchen I always bake my own breads, buns ect. Never made croissants before though. Yesterday was day 3 of the process and I must say that they turned out beyond perfect! The smell when the croissants were baking was just fantastic!!!
Now I just need a rolling pin like you use to make the process a bit easier!
Weekend Bakers says
Thank you Marita for your praise. Great your first try was already such a success.
The smell to us is addictive. If you want to try some other nice ‘viennoiserie’ with this dough check out this recipe: www.weekendbakery.com/posts…x-raisins/
Happy laminating and baking!
Ed & Marieke
Marita O says
Awesome thank you! I have looked at those recipes they both sound quite amazing! Defiantly will be trying them out, just have to wait till tomorrow now, I have my second batch in the fridge. Im hooked on this dough its great. I made a small strudel with some of my own canned apple pie filling with the end pieces and it turned out just perfect. Im curious to know, which of your recipes would you say is the most difficult? I always love a challenge.
Weekend Bakers says
Hi Marita,
That strudel is also a great idea. We would say the biggest challenge up till now for us has been getting the croissants to the point of absolute perfection with the honeycomb structure all the way to the center. This recipe is the most sensitive and other recipes with laminated dough are a bit more forgiving. Other recipes that may challenge you are the panettone: www.weekendbakery.com/posts…e-project/
The 80% hydration baguettes: www.weekendbakery.com/posts…-baguette/
And maybe not too challenging with sooooo delicious are these special treats: www.weekendbakery.com/posts…y-caramel/
Happy baking!
Shirley Ho says
Hi Weekend Bakery,
Have you guys found the way to get the “absolute perfection with the honeycomb structure all the way to the center” yet? I have been looking up on the same topic on the Internet for weeks now. What are the keys to get great honeycomb structure? Besides good lamination, is it good gluten development? No stretching when shaping the triangles? Full proof? High bake temperature like 450F?
Skyy shimatsu says
Beautiful!!!! Can you use fresh yeast ? Is there any benefit or major difference vs using the dry ? Which is best?
Weekend Bakers says
Hi Skyy,
Yes you can, no problem. If you can get fresh yeast you should give it a try. You need about 30 grams for this recipe ( instant yeast x 3). We love to use fresh yeast if and when we can get it, but there are no major benefits or differences. We do think there is a small difference in taste in favor of fresh yeast and we love the smell during proofing that is also somewhat nicer. So if possible you should try both and compare and judge for yourself.
Tay Sultan says
Hi,thank you for all your instructions I have not try your recipe yet,I hope it will be as successful as the photo. I face some problems while making croissants.” I use 11% protein and LURPAK butter ,” during the laminating process some holes appears and butter is coming out of the dough from these holes . I do not know why and how to fix it or should I give it up.Finally, I need to let you know that where I live , we do not have but Lurpak butter, organic butter is not available and the only four to get is the one I use.Thank you.
Weekend Bakers says
Hi Tay,
You seem to have the right butter and flour for the job. We do not know why holes would appear in your dough. Make sure you have proper gluten development by kneading well but not too long like we say in the recipe. Also make sure your butter is not too cold and hard (but just pliable) so you do not need to use too much force on your dough. Always handle your dough gently.
Maya says
Thank you so much! These came out almost perfect on the first try. Once I get the process down pat, I was won dering if you have any advice for how to fill croissants? Like if I wanted to fill them with jam
Weekend Bakers says
Hello Maya,
Jam is usually put in the center of the croissant. To do this, you place a dollop of jam in the center close to the edge of where you start to roll up. You just have to take into account that with any filling, jam or chocolate, comes extra weight on the dough layers, so you will end up with more of a hollow croissant in the center, so less honeycomb structure.
sayyed shoeb says
hi there
inn shaa Allah ,ill try this recipe ,lets hope for the best.
ill inform you guys after completing this .
Weekend Bakers says
Please do, always interested in your results Sayyed!
Rivers R says
Hi! just 2 questions:
1. I have 2 types of ovens, deck and convection, so, which one is better to bake croissants??
2. What about shaping croissants at day 2 and just leave in the fridge till day 2 and then proof and bake?? have you tried?? i met someone who made his croissant recipe that way, do you think its a good idea to try with this recipe??
Weekend Bakers says
Hi Rivers,
We use a convection oven and get great results with it. But every oven is different of course and we encourage you if possible to try both your ovens and see which one gives the best results.
Yes, you can shape and put in the fridge, many people do this. We do not speak from our own experience but we have positive feedback and comments below about using fridge and freezer at different stages with our recipe. Again, we do encourage people to first make the recipe as we describe it and then deviate from it with reason, so you know how the dough should look and feel and is proofed to perfection.
Happy croissant baking!
Patrick Van Mil says
Wow! You guys know what you’re doing. I followed your recipe this weekend and the croissants turned out perfectly. First time. I’ll try it again in a week or two to find out if it was just beginner’s luck on my part.
Thanks!
Pat
Weekend Bakers says
Hi Patrick,
Great stuff, thanks! Do not overthink your next try, just go with the flow and build on success 🙂
Happy croissant baking,
Ed & Marieke
queencafe777 says
Finally after third try, the croissant turned out picture perfect, flaky, honeycomb texture and color just like here in the pictures. I used one tablespoon diastatic malt powder to give it a try and color looks good. I followed the recipe as shown here with just addition of one tablespoon diastatic malt powder. I rolled it manually using my cold marble rolling pin. Did not use my dough sheeter. I kept rolling pin in freezer while I am cooling dough at the same time. I used Plugra butter; it is delicious. Thanks again.
Weekend Bakers says
Great to read about your excellent result and the use of diastatic malt for this recipe.
Cold rolling pin also a very good idea of course. Looked up plugra butter because we do not know it but see that the fat content is exactly the same as our dairy butter (82%).
queencafe777 says
Have you used tabletop dough sheeter like the sommerset to make pizza? I want to know if anyone has and what number shall I adjust to the first roller on the top. I want to save time and energy. Thanks
I made this croissant before but the inside is not cooked but outside it is looks baked. It is somewhat tough but taste good since I used Plugra butter.What went wrong please? thanks
Weekend Bakers says
Sorry, no experience with a sheeter as we do everything by hand. Maybe somebody else has?! Seems you also have to play with your oven temperature a bit and /or give the croissants a bit longer (at lower temp). Try different batches and make notes.
Good luck with it.
Lerrie says
I am excited with this recipe! I love croissant!!
I started doing this recipe the first time ( I know it is not going to be perfect the first time.. sigh) I am on my 3rd day but I just realized that our oven only do temp the lowest is 190F, which is a problem doing the proofing. I tried doing the cool oven with boiled water in a pan at the bottom but after 45mins the butter melted (as my heart melted as well).
Any alternative advice you can give me to do the proofing?
My husband recommended to just leave the dough in the kitchen counter but I am not sure if that will be ok or our room temp is enough.
Thanks in advance!
Melanie says
I’ve actually found a lot of sights that said leave it out at room temp! It takes a bit longer if you do but the proofing is just to allow the dough to puff up and seal in the butter so it should be fine if you just let it sit for an hour or two at room temperature.
Weekend Bakers says
Excellent advice from Melanie, because it is important to control the temperature to avoid butter leaking out, it is better to allow for some more proofing time and just be patient. Otherwise try and use the warmer, draft free, places you can find.
Another ‘trick’ used is turning the oven on for a very short while, then turning it off and use as proofing cabinet. But again, you need to make sure (and preferably be able to measure) the temperature is not too high!
Djaka says
thanks for the clear step by step tips and tricks…
I have problem; cant fold the dough nicely like you did here.
Weekend Bakers says
Hi Djaka,
If you give it some more tries, you get the recipe ‘in your fingers’ and you will be able to work quicker and more precise. You learn more each time you try.
Djaka says
Oh by the way,
I live in tropical country, where it’s hot and humid.
I uses pastry margarine because it is impossible to use butter as it melted very quick.
Have you ever try pastry margarine for croissant ? If yes, let us know if you like it or not. 🙂
Weekend Bakers says
Hi again Djaka,
Because we have such good quality butter here, we always use this and never margarine for almost as long as I can remember. But our conditions are very different from yours of course and it is good you have a substitute that allows you to make the croissants. I hope it will still be very nice.
Annie says
Hello,
I am dying to try this recipe, however i would like to know can I freeze the croissant BEFORE proofing? and then when i want them just let them thaw out at room temperature and proceed with the rest of the instructions?
Thanks!
Weekend Bakers says
Hi Annie,
Yes you can and other bakers (see comments below) have done this too. Just make sure they are perfectly proofed before baking.
ev says
Did anyone creamed the butter instead of beating with a roller ?
ev says
Also anyone used diastatic malt %0.5 ?
Weekend Bakers says
We have never done this, but the important thing is the butter should be cold enough when laminating, so after creaming we would put it back in the fridge again before using it. As for the diastatic malt, we have never used it or thought about using it with this recipe but would be interested to read about other bakers’ experiences with it.
Mónica says
Hola Marieke & Ed,
I love your work, so accurate! I’ve tried to make croissants for the first time following your recipe. I’ve made a few mistakes on the way, especially rolling the dough but they still came so good looking & delicious. I’m on my third time trying now, I would like to be as good as you at rolling. Gosh! It’s definitely a skill! ILY Muchas gracias por compartir! Adiós
Laura says
I made these a couple weeks ago with regular unbleached all-purpose flour and loved them! I decided to purchase some French 55 flour to see if there was a noticeable difference and there definitely was!! Both flours made delicious croissants but the Type 55 flour was best. Extra flaky and kind of stretchy on the inside. I will be using it for all future croissants instead of the regular flour. Highly recommend it.
Weekend Bakers says
Hi Laura,
So good to read both our experiences with these flour types are the same. Thank you for sharing and confirming.
Happy croissant baking!
Ed & Marieke
sarah says
Hello,
I am having a problem with my croissants collapsing in the oven. I proof them for 2 hours at about 77F and they double in side. But when I cook them they again rise then fall flat before cooking is complete. Cooking starts at 350F (not convection oven) then after 5 minutes I lower the temperature to 325F. They brown gloriously and taste fabulous but I wish they were puffier.
Thank you,
Sarah
Weekend Bakers says
Hello Sarah,
Judging from your words the advice we can offer you is first to look at the flour you use and the amount of protein. Maybe the weakness of your flour in combination with the proofing time is a bit too much. So either try a different flour if this could be the problem (aim for around 11% protein content) or shorten the proofing time a little bit.
Hope this helps. Happy baking!
Marieke & Ed
Assaf says
Thank you so much!
I followed your recipe and got absolutely great tasting and gorgeous looking croissants a couple of hours ago. Although I’m fairly experienced with baking, this was my first time making croissants and so the success is especially sweet. Thanks for making me happy : )
Weekend Bakers says
Hi Assaf,
Thank you for making us merry with your comment!
And maybe you would also like to try something else with the croissant dough. We can recommend these recipes too: www.weekendbakery.com/posts…y-caramel/
&
www.weekendbakery.com/posts…x-raisins/
Happy pastry baking!
Sagal says
Hi
i really like your recipe and want to try it. Can i lower the butter content in the dough to less than 40 g and in the lamination from 280g to 200g ?
Will appreciate your quick replay
Thanks
Weekend Bakers says
Hello Sagal,
Yes, you could do that, however you will get a lower quality croissant. In our opinion it is better to eat one really good croissant than two lesser ones. So what would be your reason for using less butter?! If it is a question of costs then of course it is valid. Otherwise we would suggest making the recipe as described for your first try, and maybe after that make a version with less butter.
Happy croissant baking!
ehab says
You don.t use bread improver
Weekend Bakers says
We do not use any bread improver.
Katherine chudleigh says
I get how to make croissants but when I roll my butter it fractures instead of rolling into a sheet with the dough, then by the end I can see the butter it looks like sheet ice melting in the attic pls help.
Weekend Bakers says
Hello Katherine,
More people have reported this problem /challenge (see comments below) and it usually has to do with the butter used. The organic butter we use has a fat content of 82% and is pliable and does not break up. So the right butter is important to begin with but also just the right temperature of the dough and butter of course so it is just pliable and does not break but is not too warm so it will start to leak or melt. Also see our video from which you can hopefully judge what our butter looks like:
www.weekendbakery.com/posts…roissants/
Greetings,
Marieke & Ed
Christina Cruz says
I made this for the second time. The dough recipe is delicious. It’s a bit of a challenge rolling out the dough in the height of the Australian summer. Had to work quickly so that the dough doesn’t sweat but they still turned out really nice and yummy. I think a few more tries and my croissants will be perfect. Thank you for the recipe and the instructions. A tip for those just starting- read the instructions at least half a dozen times and watch the video at least 3-4 times.
Weekend Bakers says
Thank you and applauding your tip of course! Excellent.
Marieke & Ed
Wiji indah arianti says
Hi my name is wiji i live in macao.I have follow your recipe to make croissant but the result is not perfect yet.look good from outside but inside is not good.inside all is stick together.Could you tell me why that happen to me?thank you
Weekend Bakers says
Hi Wiji,
It will very likely be just not having enough experience. You should not expect perfect croissants on your first try. You need to gain more experience. This way you will be working quicker and more accurate, which is necessary to get a good croissant. The most important thing is to follow the recipe to the letter and to work if possible in a cool place.
For more excellent tips, also from other bakers who live in warm climates, see the comments below.
Happy croissant baking!